I have 6 Ikea Nektarin self watering pots that do great for most plants, but when it comes to growing tomatoes, cucumbers, or other water sucking plants that go through a gallon or more of water on a hot day, the included reservoir is insufficient. I tried the ceramic watering cones while on vacation, but sometimes they work great and other times not so well, and they definitely can’t keep up with a 5′ tomato. I looked around the internet for some ideas on a setup that would be more reliable, but didn’t find something as small and elegant as I would have liked, so I pieced together the best of other approaches and came up with this. Materials:
- 5 gallon bucket
- Plastic bread box (Daiso is perfect for these if you have one around, see photos for ideas for alternate materials)
- 1/4″ barbed mini float
- 3/8″ rubber grommets (2 for the main setup, 1x for each pot)
- 1/4″ inner diameter, 3/8″ outer diameter flexible hose
(length depends on number of pots, 4′ minimum for first pot) - 1/4″ T connectors (optional, to link multiple pots to a single source)
- 3/8″ drill bit
Steps:
- Determine the maximum water level for the interior of the self watering pot. You want the water level to touch the bottom of the soil to allow wicking, but not overly saturate it. I don’t want more than 1/4″ of water in the soil.
-
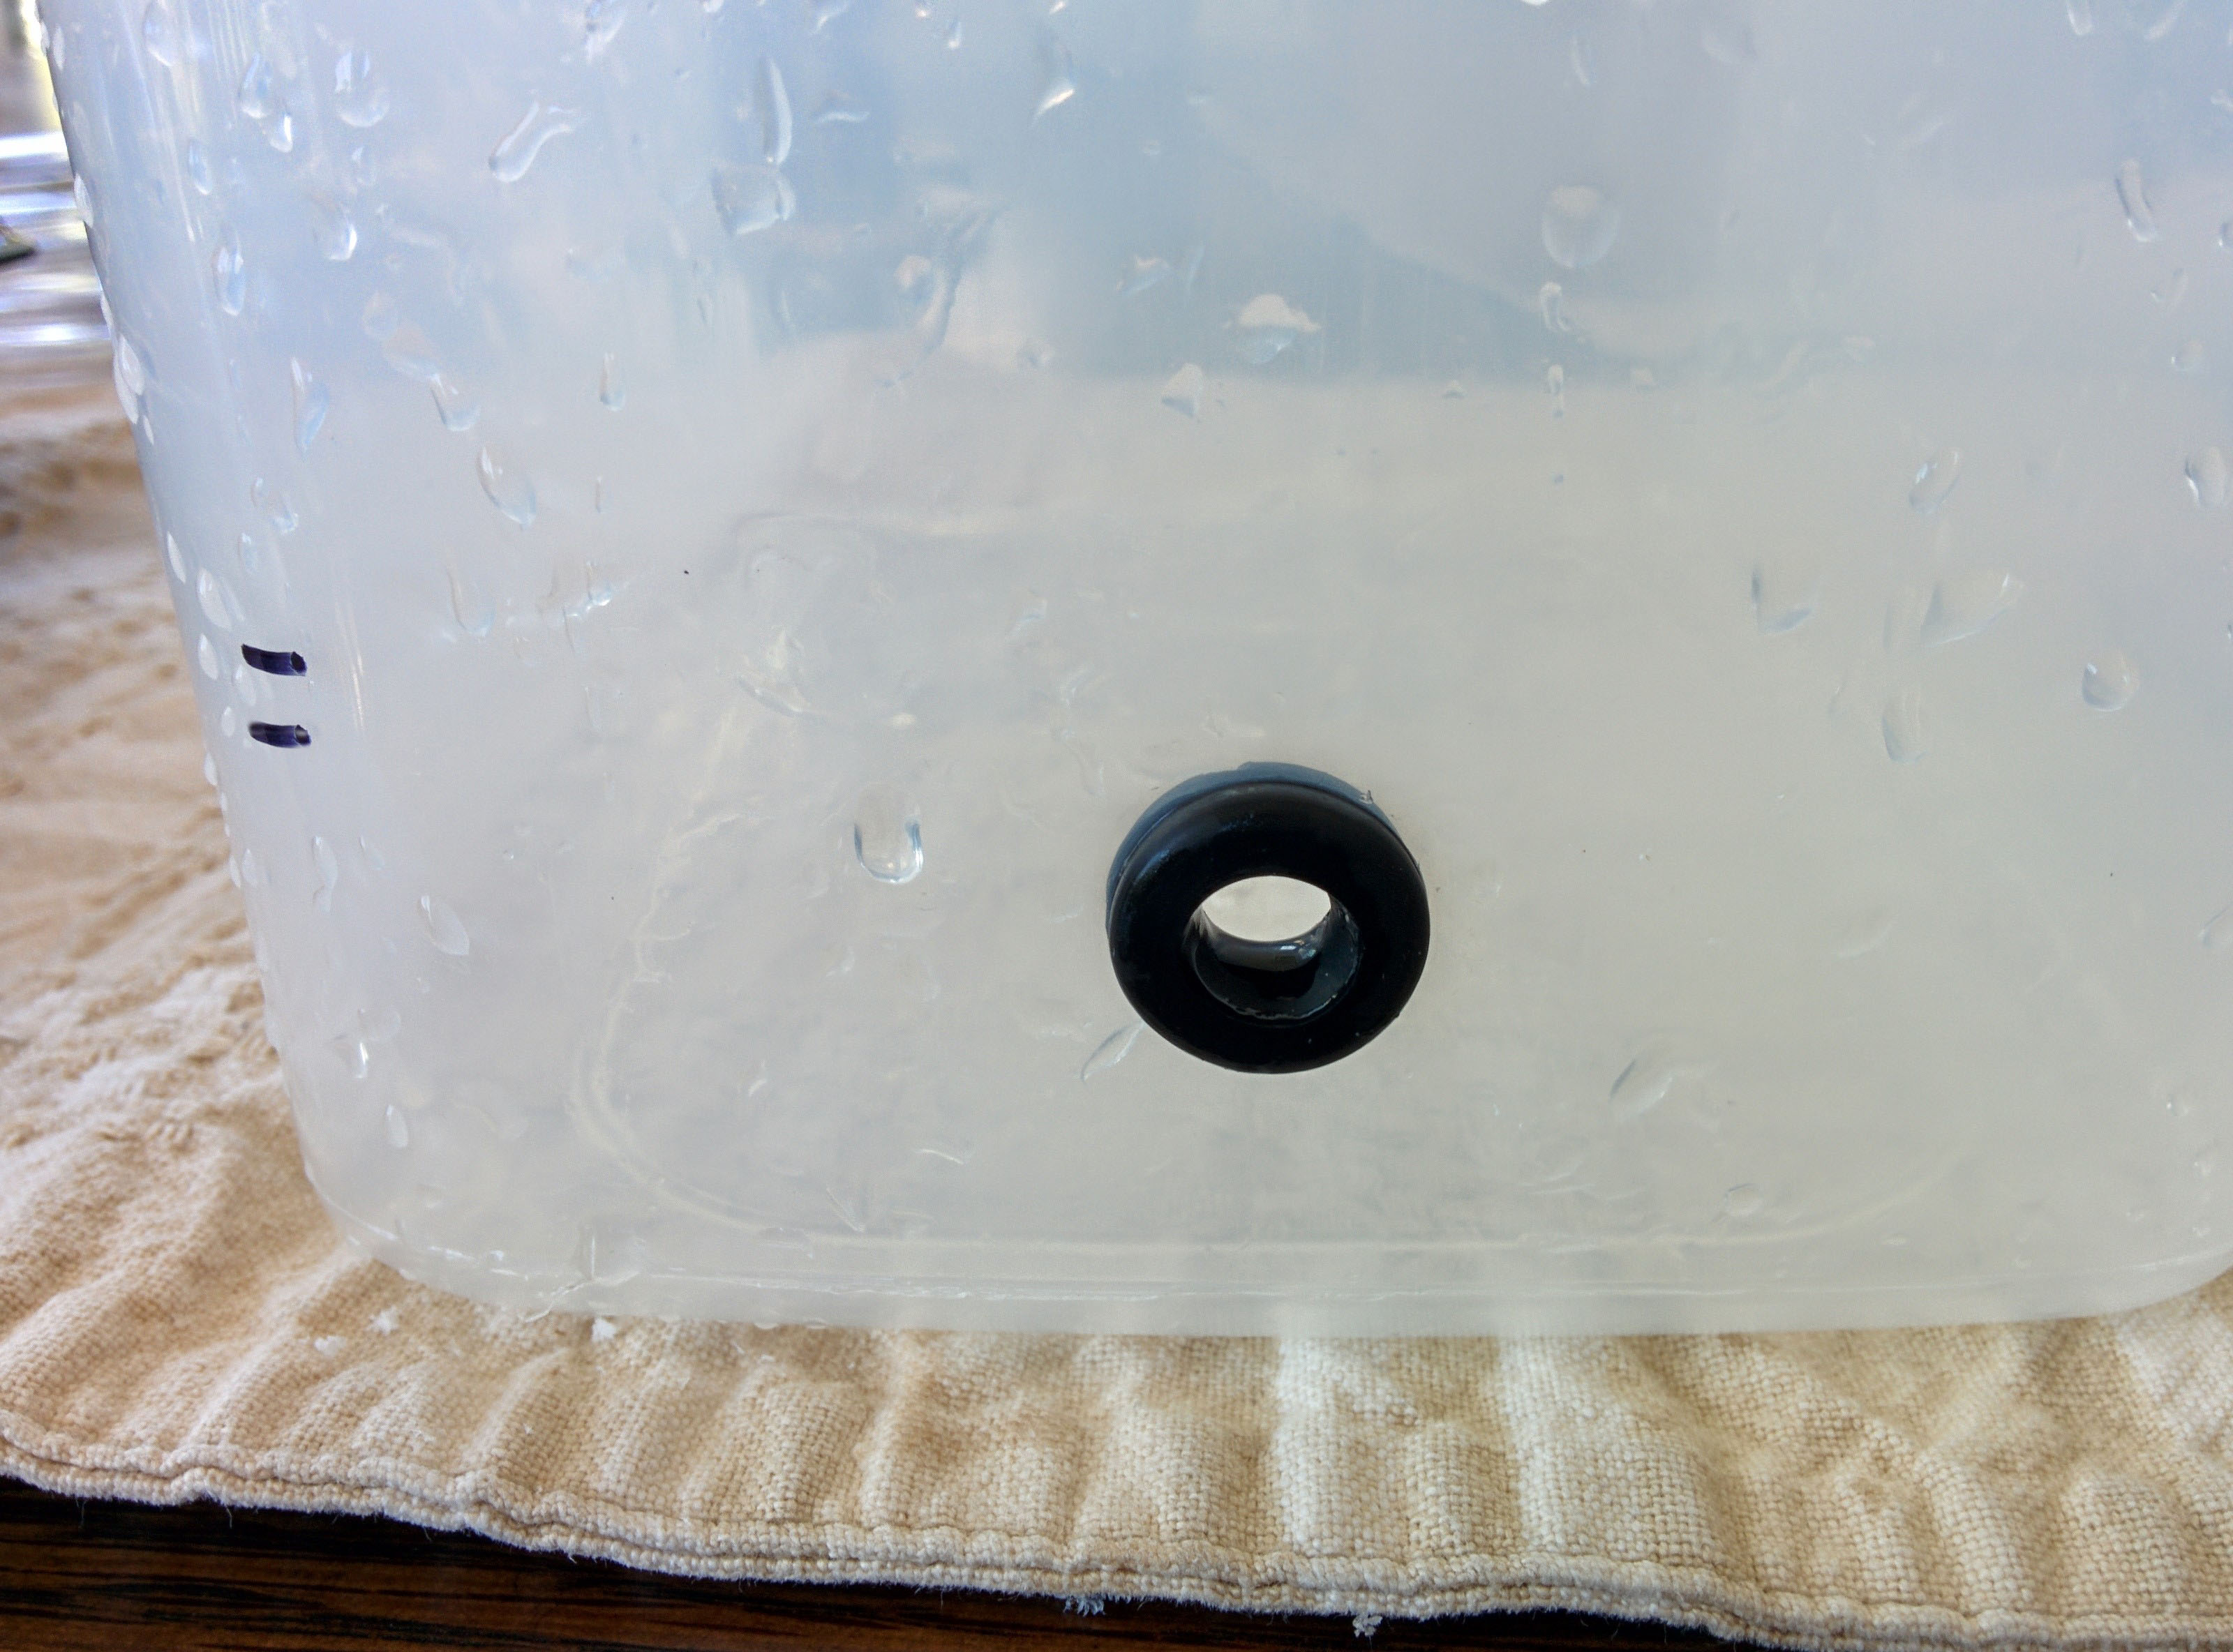
Pot with grommet in place Drill the hole into your self watering pot. The hole for water intake in the pot will need to be below the maximum water line for the water to refill appropriately. I chose the top of the hole to be 1/4″ below the desired water line. If it is a soft plastic, drill with very light pressure, taking your time, otherwise your hole will not be clean, and could be a total disaster if the drill pokes right through with ease. You will want the edges on the plastic to be smooth for the grommet to make a clean seal.
- Fit a grommet into the hole, it’s going to appear to be too big, but we’re after a super tight fit to prevent leaks. Use a blunt tool to press the grommet through until it is in place.
- On one side of the bread box drill a 3/8″ hole at the same height as the hole for the pot. Fit a grommet through it.
- Connect the pot and the bread box together with 1.5′ of flexible tubing. Now it’s a tight fit, and you won’t get the hose into the grommet without some coaxing. I used some food grade oil to get them through.
-
Maximum water level illustrated 
Max and min water lines We now want to determine the minimum and maximum water levels and mark them on the bread box. Fill the float box and the pot with water until the minimum level is reached. The water level will reach equilibrium on its own (the float box and pot need to be on the same level). If air bubbles are in the tubing, coax them out. Mark the minimum level on the float box. Fill with water until the maximum water level is reached and mark it. My markings are approximately 1/4″ apart.
- Empty the system of all water to continue.
- For our mini float, drill a new hole into the bread box, slightly above the maximum water line, opposite our existing hole. The float is adjustable, so don’t sweat the position too much.
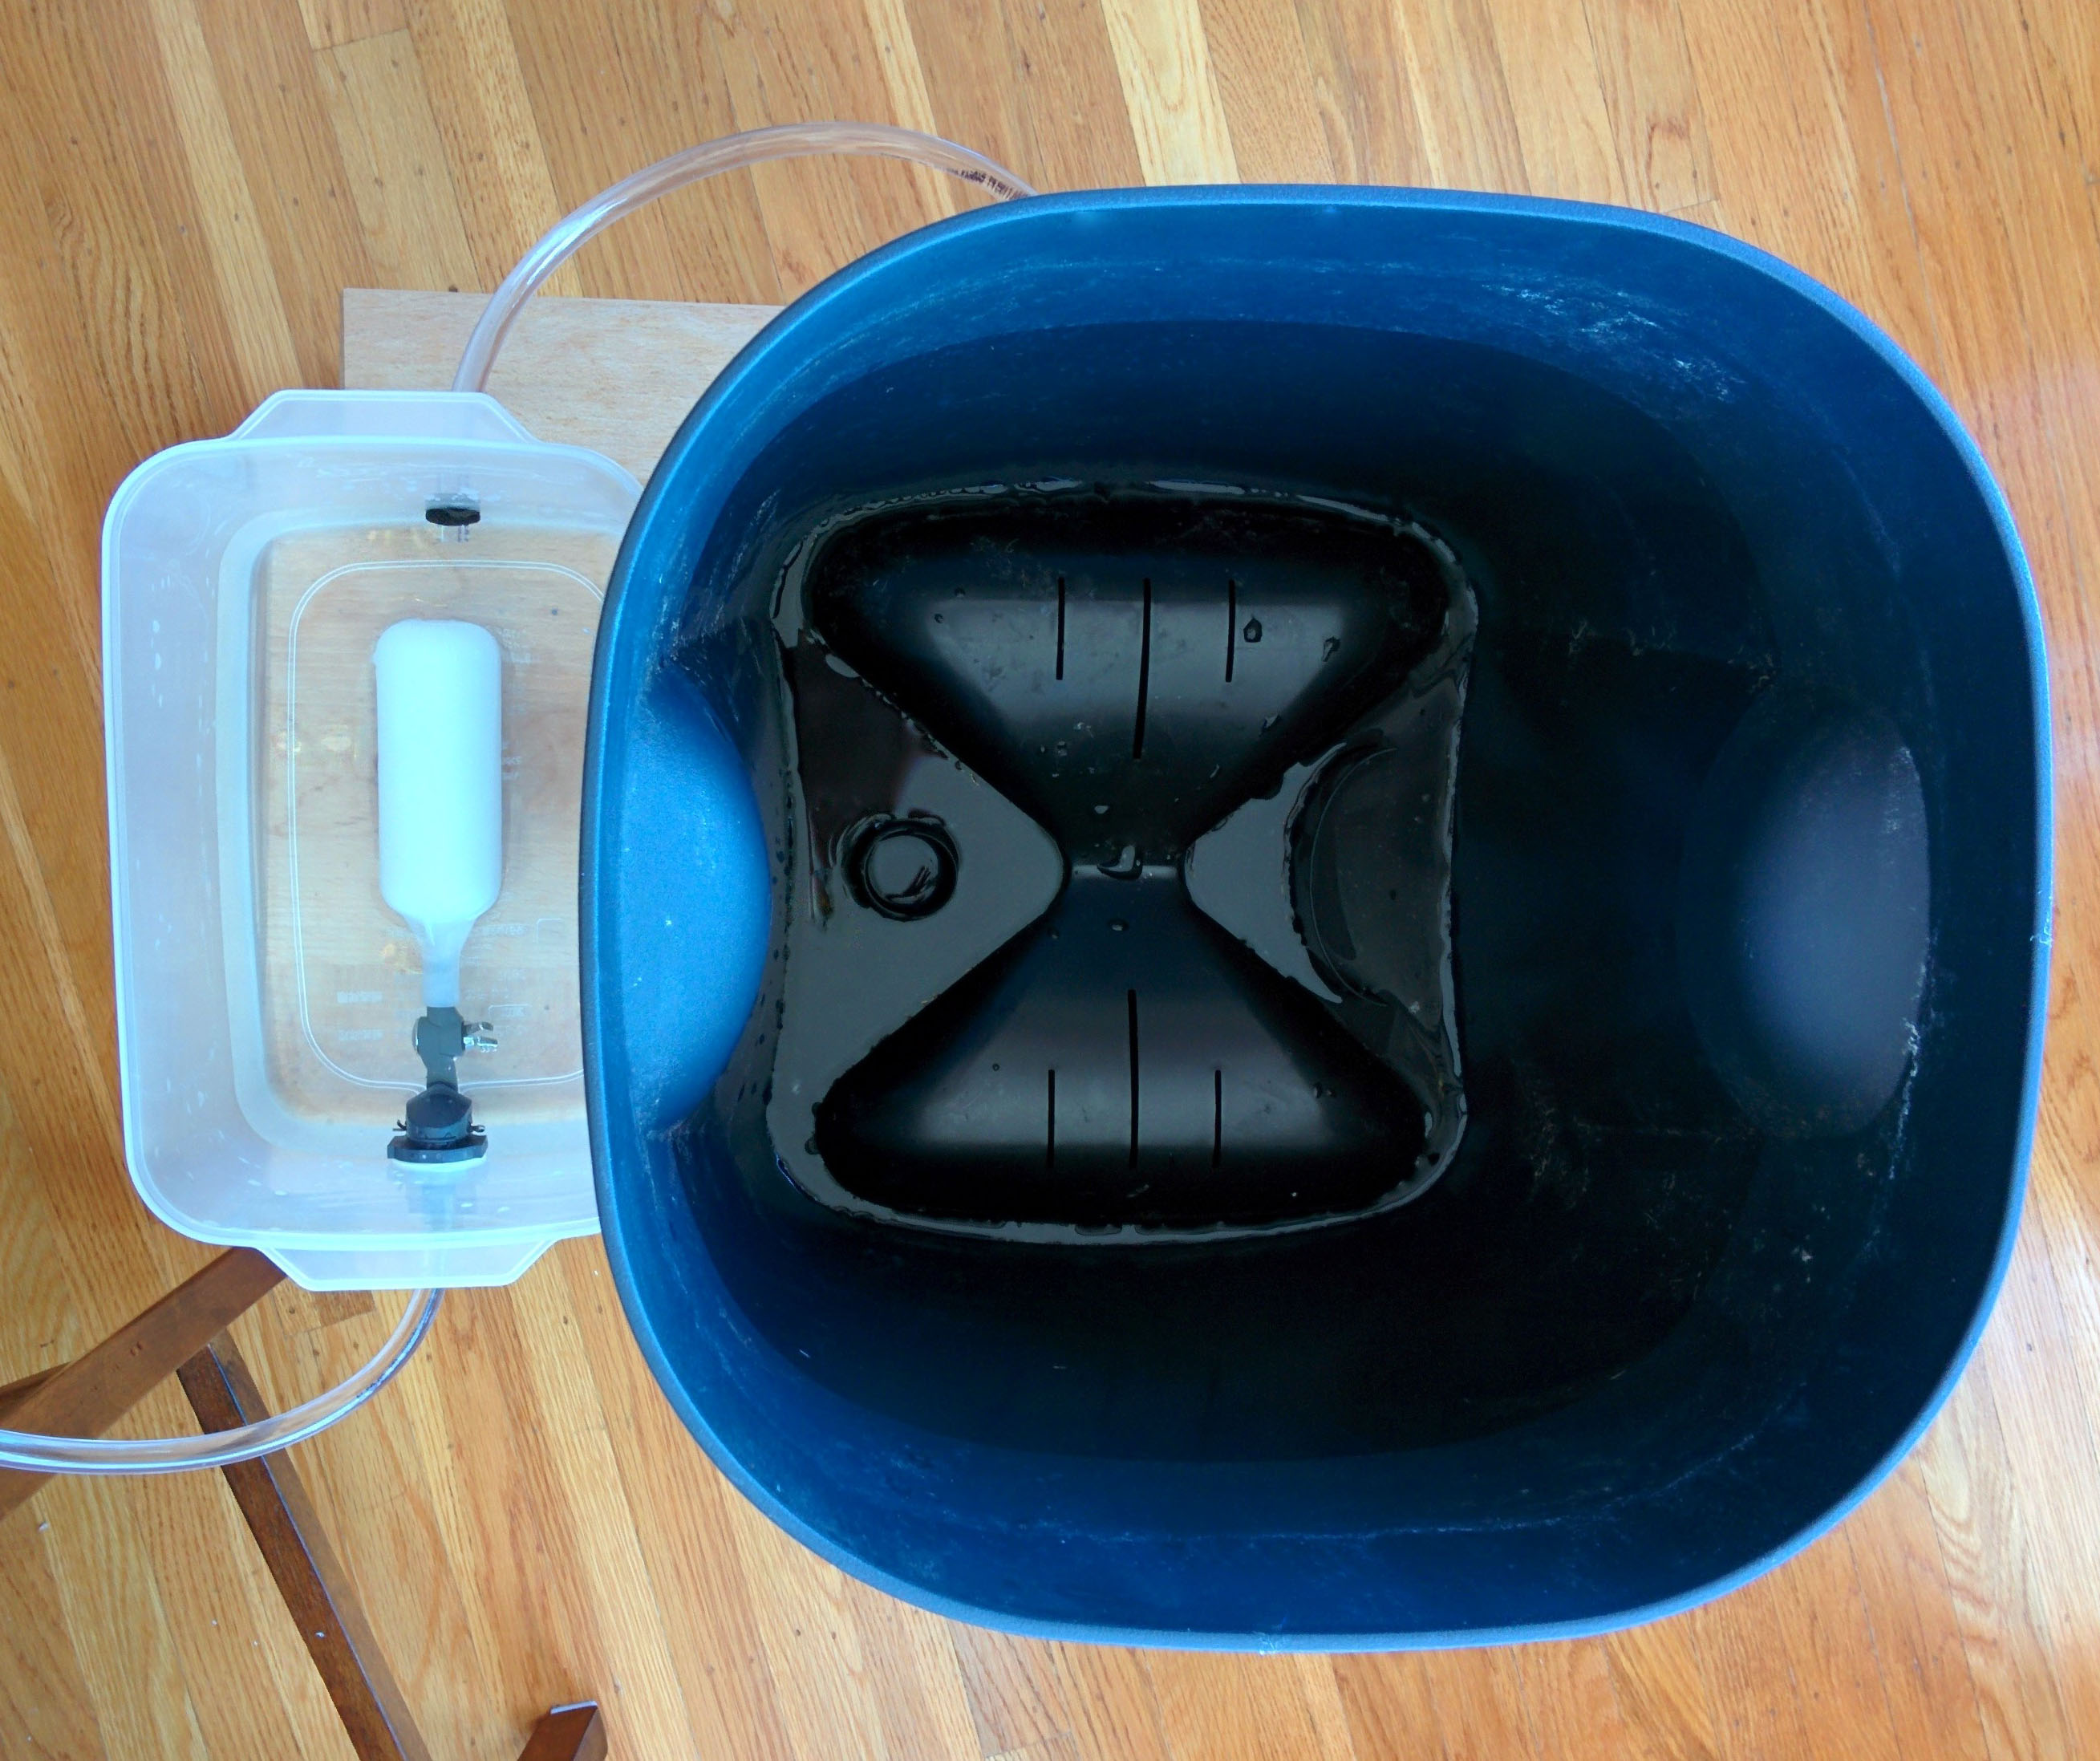
-
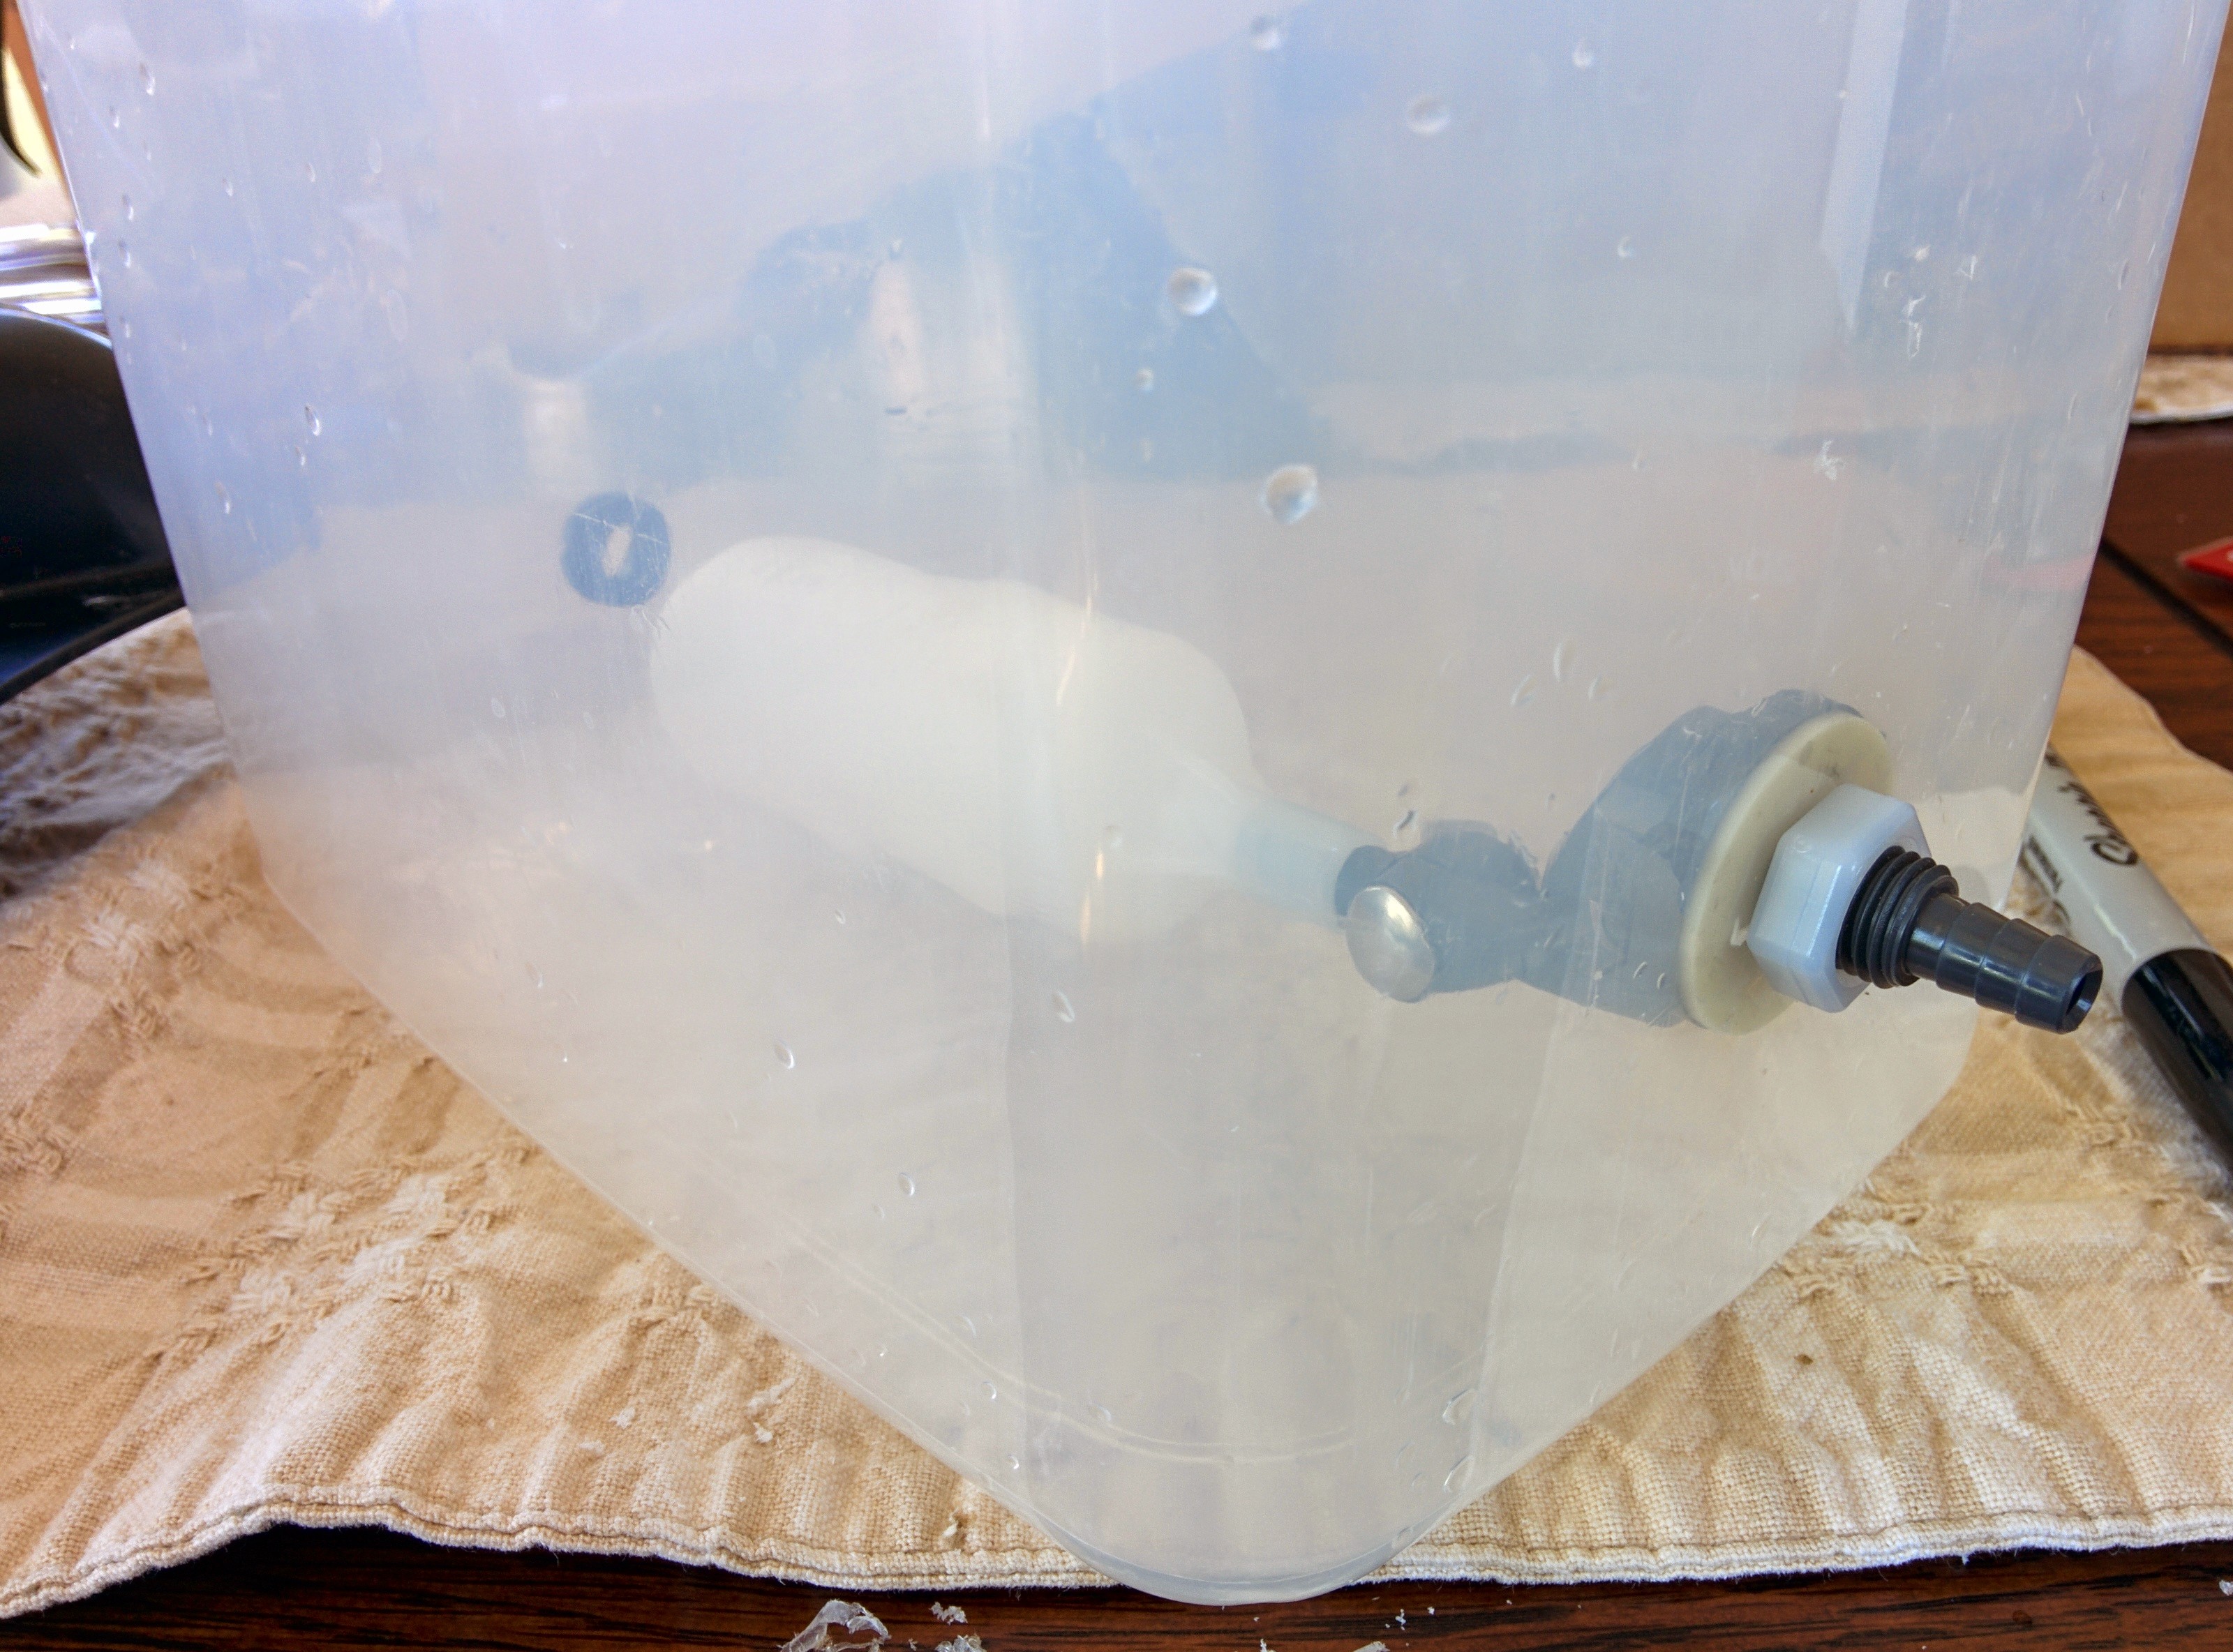
Complete float box Unscrew the hex bolt on the mini float, and insert the barbed end through our new hole and secure it with the plastic bolt. Hand tight was sufficient for me, but you might want to tighten it down a little more with a wrench, taking care not to over-tighten as these are plastic components. We now have a float box. This will maintain our water levels in each pot. The float box and any pots connected to it will need to be on the same level, otherwise over or under watering will occur.
- On your 5 gallon bucket, drill a hole 1/4″ above the interior bottom, and insert a grommet.
- Now, let’s connect the water supply to the float box with 2.5′ of tubing.
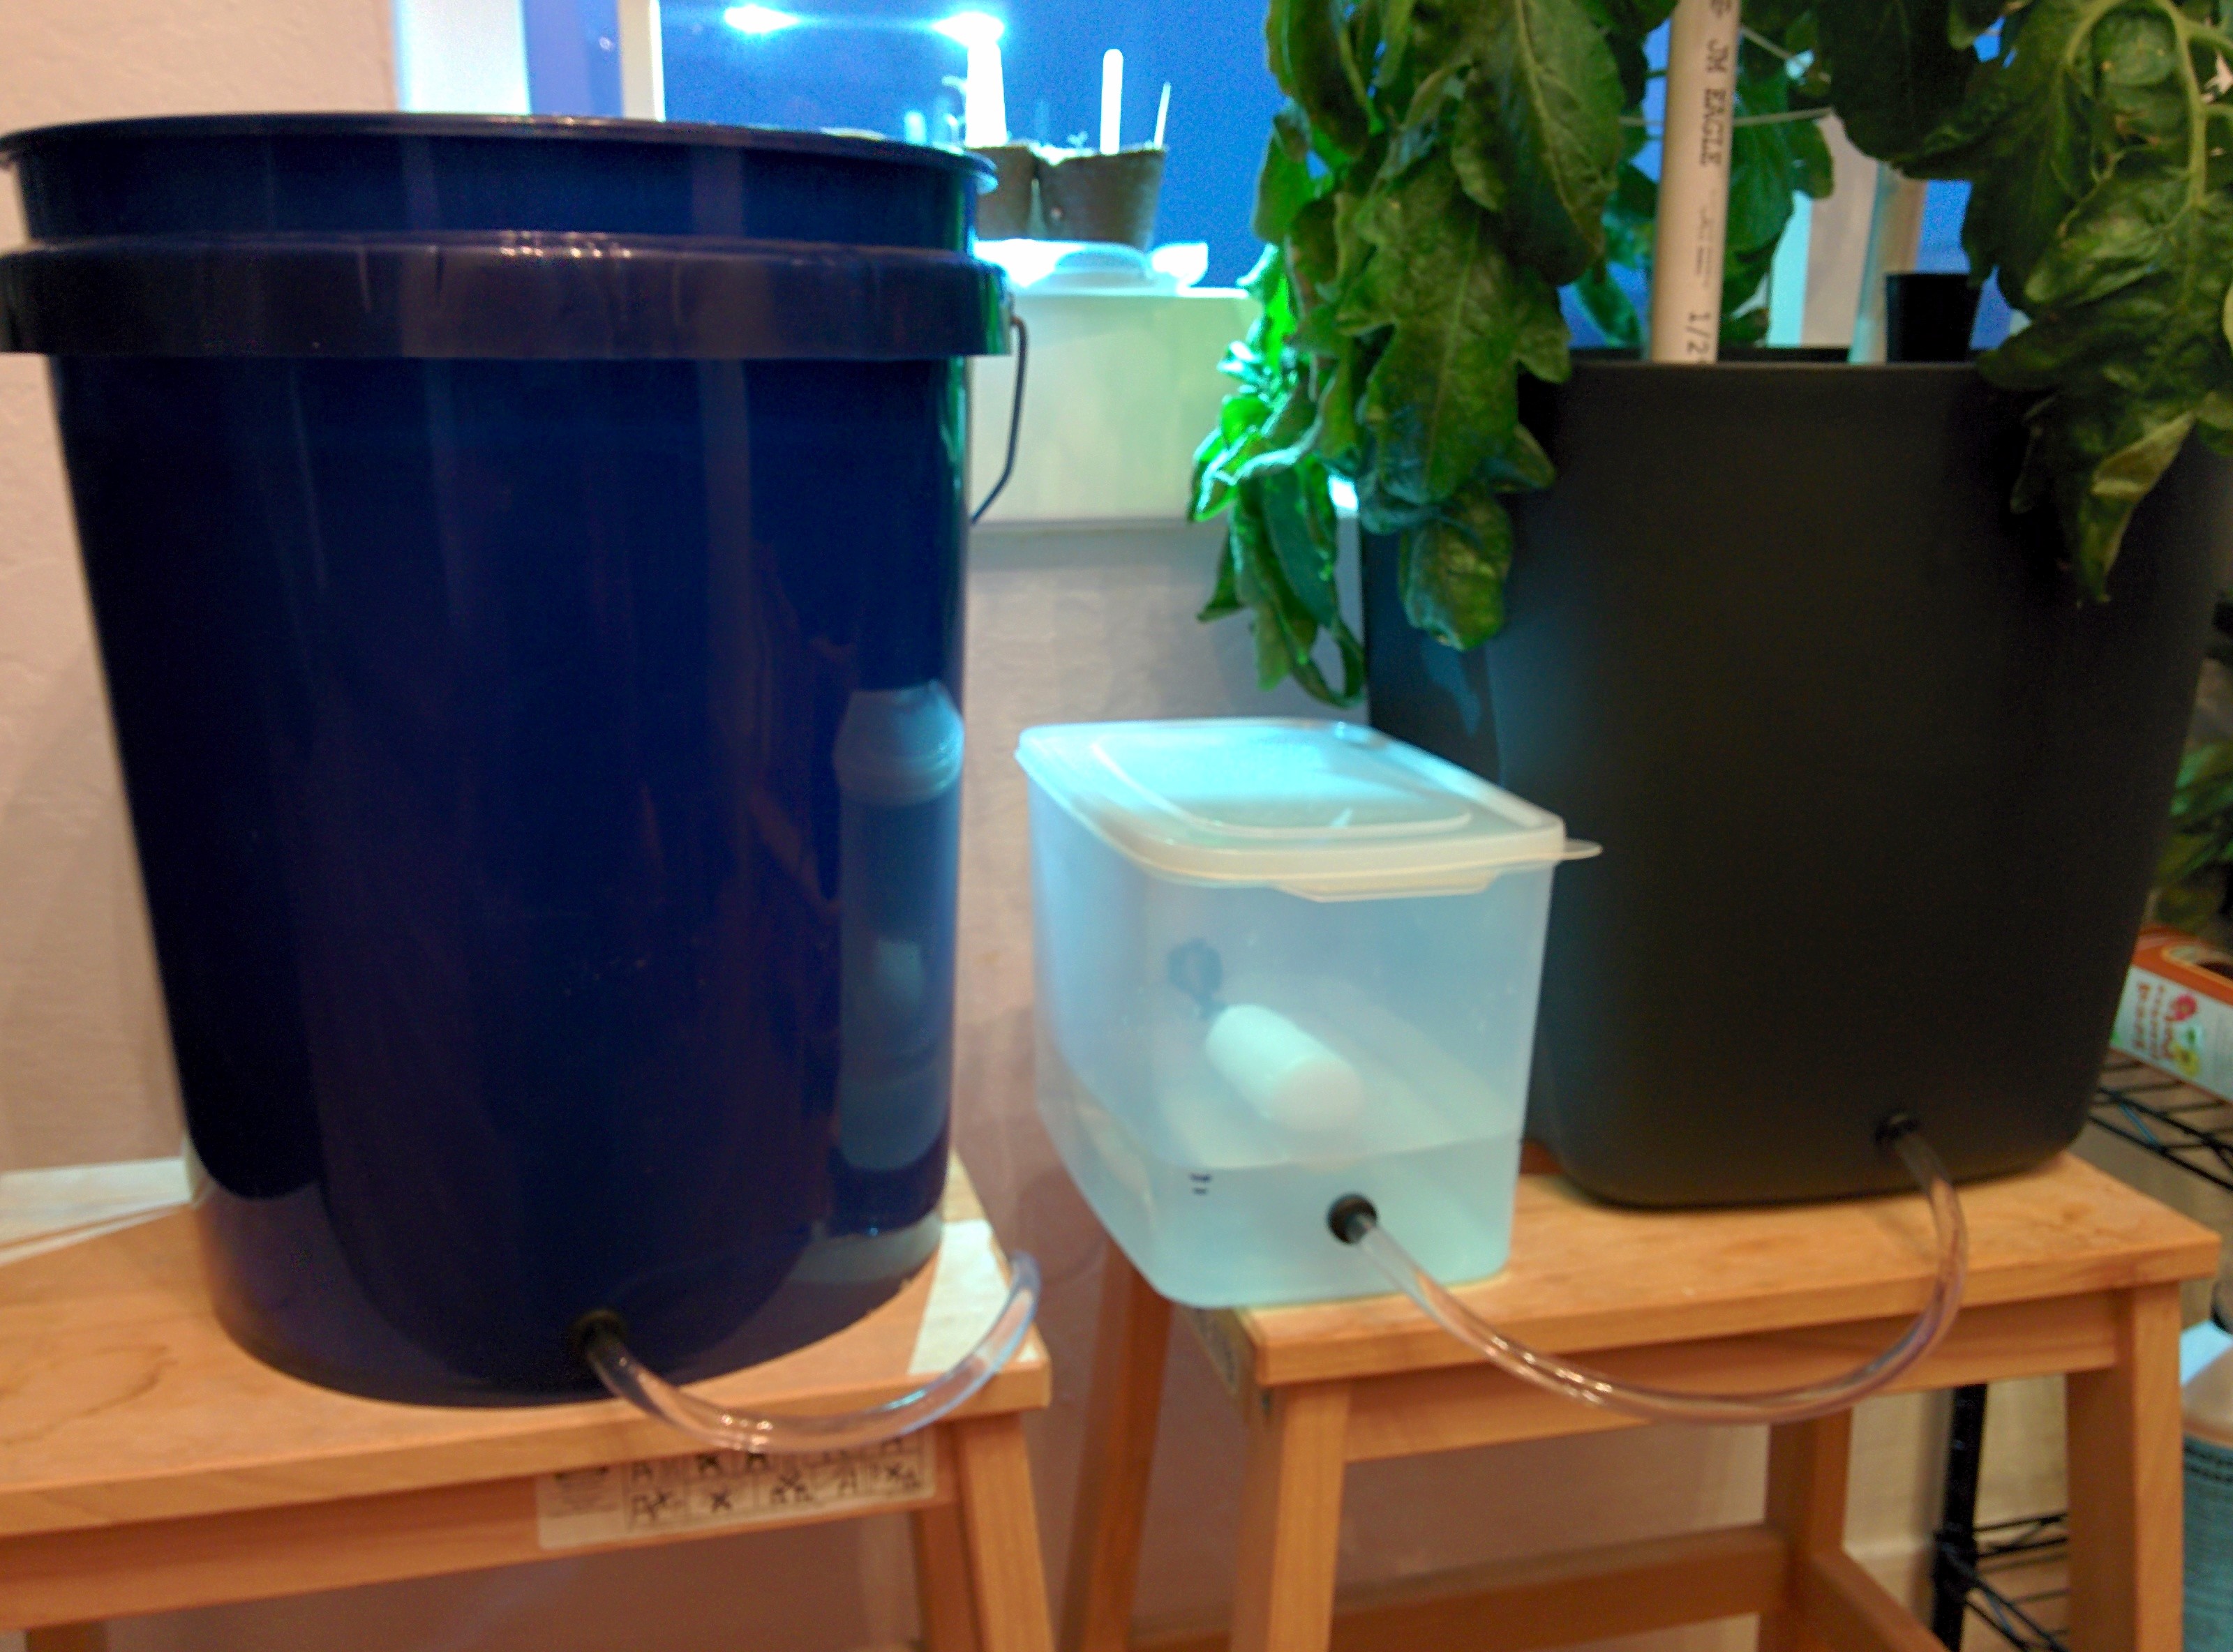
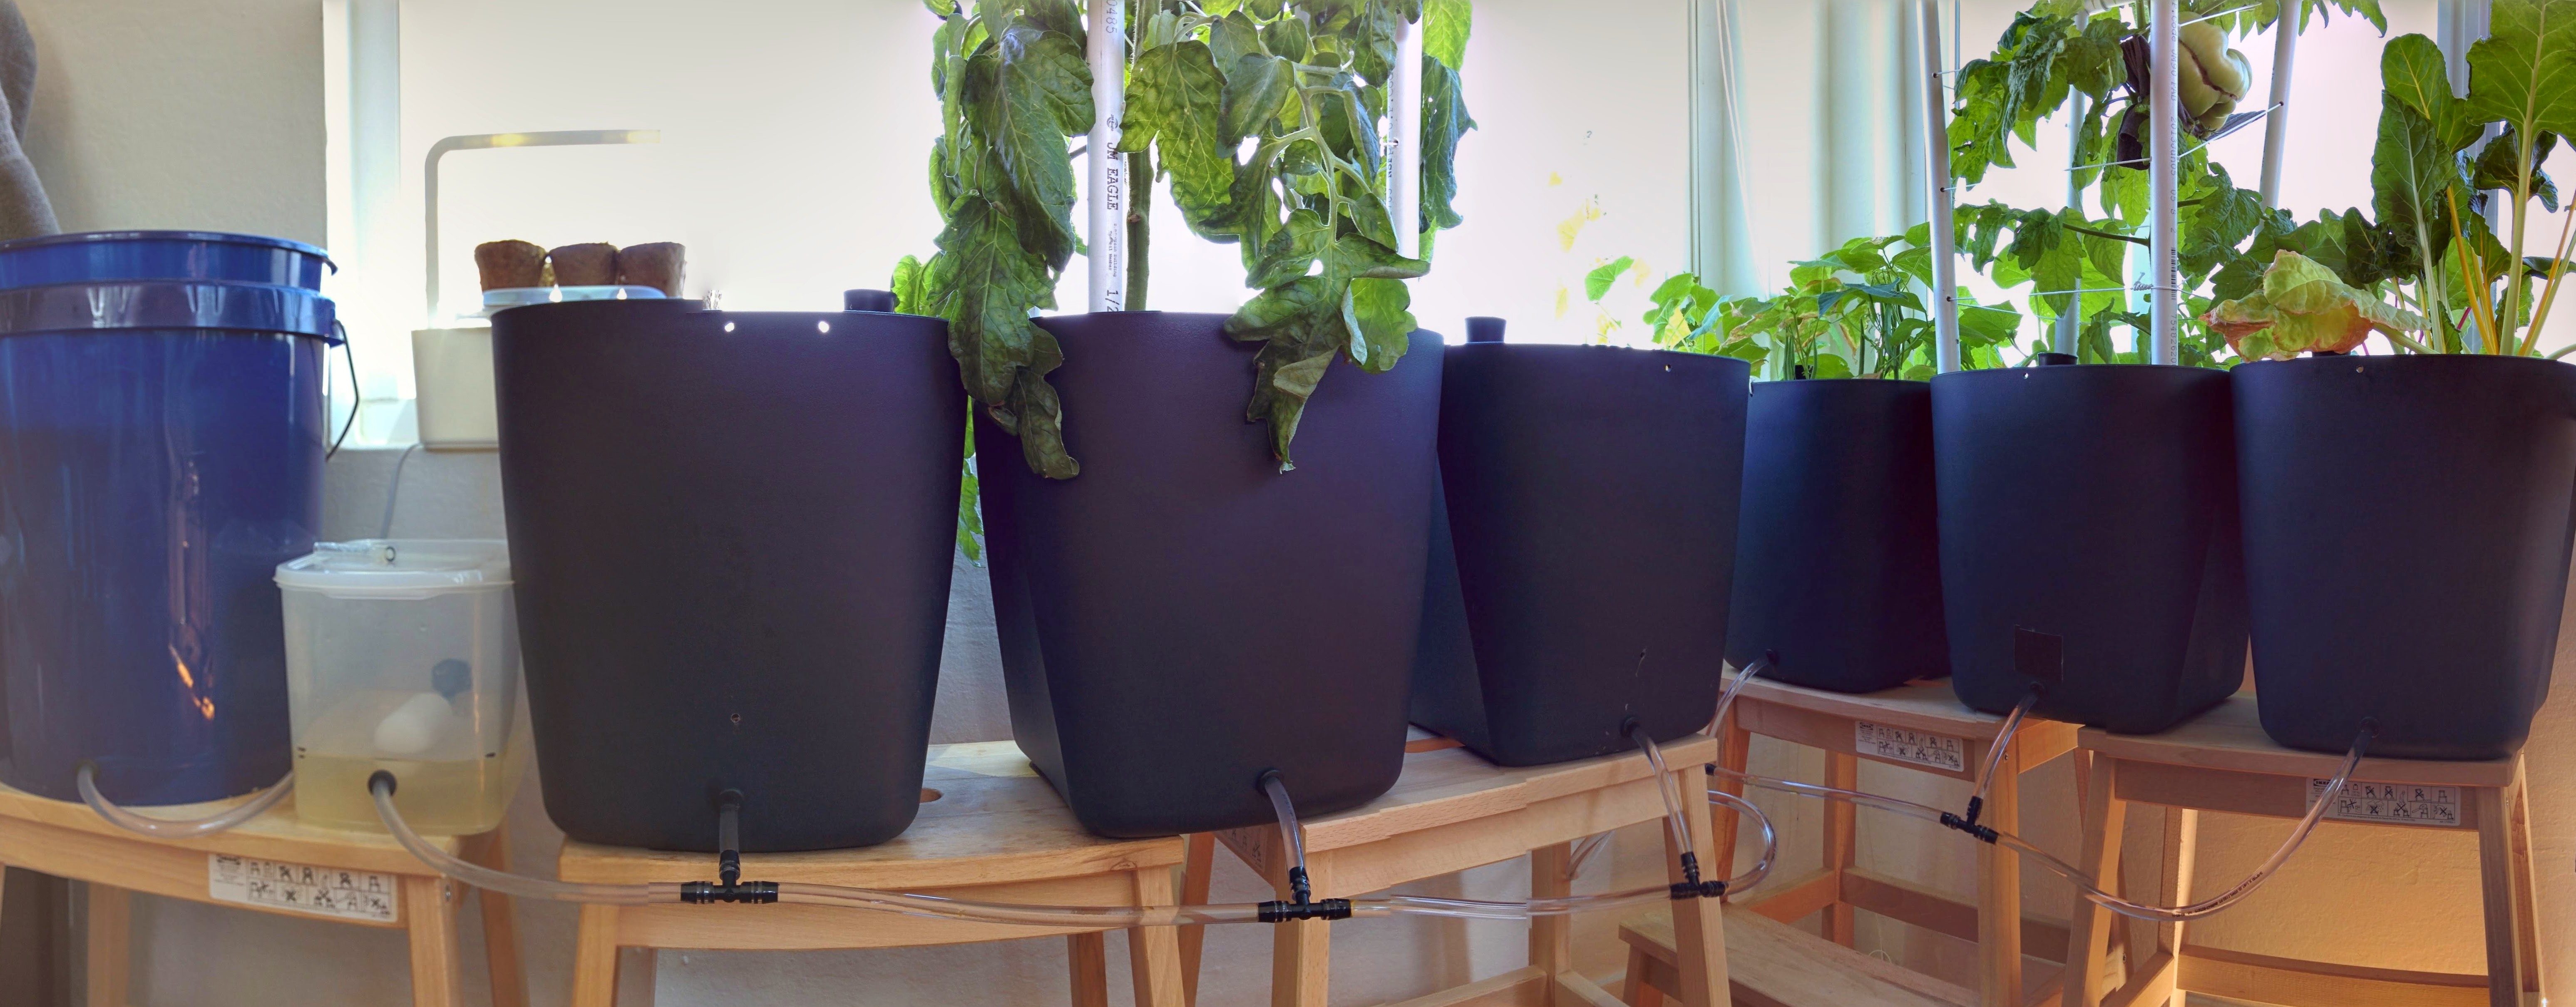
- For the physics to work, the top of the water level in the water supply tank needs to be above the float box and pots. It’s not elevated in the photo, because it’s unnecessary at the current consumption rate, but I will elevate it when I go on vacation, especially if the consumption rate of water will be at the limits while gone.
- We need to take some time getting the float properly adjusted, but we need water flowing through the system to do this. With everything connected, and the bucket elevated, fill the water supply half way with water. It will take time for the water to reach the pot and fill it to the height the float is set to. If there are air bubbles in the lines coax them out as they interrupt the water flow.
- Ideally we want the water level to be in the middle of our two water line markings. If the water level rises too high in the pot, lower the float a little, empty some water out of the pot and the float box back into the water supply and let it fill to the new level. Adjust the float higher if the water is too low and test again. A small adjustment makes a big difference, and our tolerances are low for deviations in water height, so it might take some effort to find the right position.
- When the right position is found, test it by removing water from only the pot, letting it fill, and repeat a few times. If it’s all good, you’re done with the initial setup!
- To connect multiple pots to the same float box, use 1/4″ t-connectors to string a water supply line to each pot.


Update: After a full month of the entire setup all connected, the tomato plant started to dry up at the top and after some examination it appeared the water flow was blocked. The vinyl tubes had started to be coated in white on the interior with a biofilm that was accumulating enough to block the flow in the T connectors. Ahhh the joys of discovering the byproducts of interconnected growing mediums.
I drained the entire system, and flushed it several times with boiling water to get everything flowing again but wanted to control this undesired growth.
After doing a bit of research on minimizing biofilm accumulation in sealed water systems hydrogen peroxide beat out chlorine and other disinfectants in killing biofilms over extended periods of time. The next obvious research to do was the effect of hydrogen peroxide on plant root systems. Turns out it’s actually beneficial, delivering increased oxygen to the roots. Actual quantity of H2O2 per unit of water are highly variable depending on the source; I’ve chosen 1 cup of 3% H2O2 per 5 gallons of water. If you search for “hydrogen peroxide hydroponics” you can find relevant articles and decide for yourself. A very inexpensive source of H2O2 is “non-chlorine bleach”. Typically it has a higher than 3% concentration of H2O2 than what you would find at a pharmacy in the brown bottle, but do find one that does not have fragrances or other additional ingredients that may harm your plants.
Update II: I switched to a black tubing this stops the algal growth from blocking the water flow.
Update III: When growing large plants that take water up quickly and have robust root systems, like a full size cucumber, the water flow can be disrupted and result in the plant drying out. Whether this is from a physical blockage from roots covering the tubing or plugging it, or if the pull of water is disrupted with air bubbles and it can’t be overcome due to surface tension, I don’t know, but I was able to solve this with 3 things: windshield washer pump, variable voltage ac adapter, Wemo Mini Smart Plug. I cut the tubing just after the float box, and connected the pump at that point. I spliced the wiring from the adapter onto the pump, and starting with the lowest output voltage, adjusted higher until the pump was able to pump water. I then plugged it into the Wemo Mini Smart Plug and set up the schedule to run every 12 hours and auto shut off after 1 minute.
2 thoughts on “Extended reservoir for self-watering plant containers”